How to Escape from a Wrist Grab
We're all about useful self-defense education here. While I still recommend attending a class with someone who is experienced enough to correct you on what's missing if it doesn't work, I want to provide a simple online guide for escaping from a wrist grab. Just keep in mind that reading about it and using it are two different situations.
This is also a review for our current students to keep them sharp!
First things first, let's address why we practice the wrist grab defense. Breaking free from a grab is something I think is fundamental to Karatedo and should be one of the first things a new student is taught how to do. But why is that?
This is because the primary purpose of self-defense is not to attempt to control the attacker, but to refuse the attacker control over yourself. Karatedo training is about learning tools to enforce your own boundaries.
Note for the defender before we begin: You do not need to be strong in order to do this. In fact, if you are doing it correctly, you should feel like you are not resisting against the opponent's force at all. If you have to struggle to get out, that's a sign you're doing something wrong.
Note for the attacker: HOLD ON TIGHT! By playing the role of the attacker, you have a responsibility to challenge the defender, thereby ensuring they do the technique correctly. If you let go the second they start to struggle, you are hampering their confidence and their growth.
Let's get started!
Escape from a Wrist Grab — Beginner Version
This is the one we teach first in class. Ironically, it's more complicated than the 'advanced' version. What makes it the ‘basic‘ version isn’t how complicated it is, but how high-priority it is for beginners to learn—And it’s a higher priority than the ‘advanced‘ version because it’s more defensive than offensive. You'll see what I mean.
The setup:
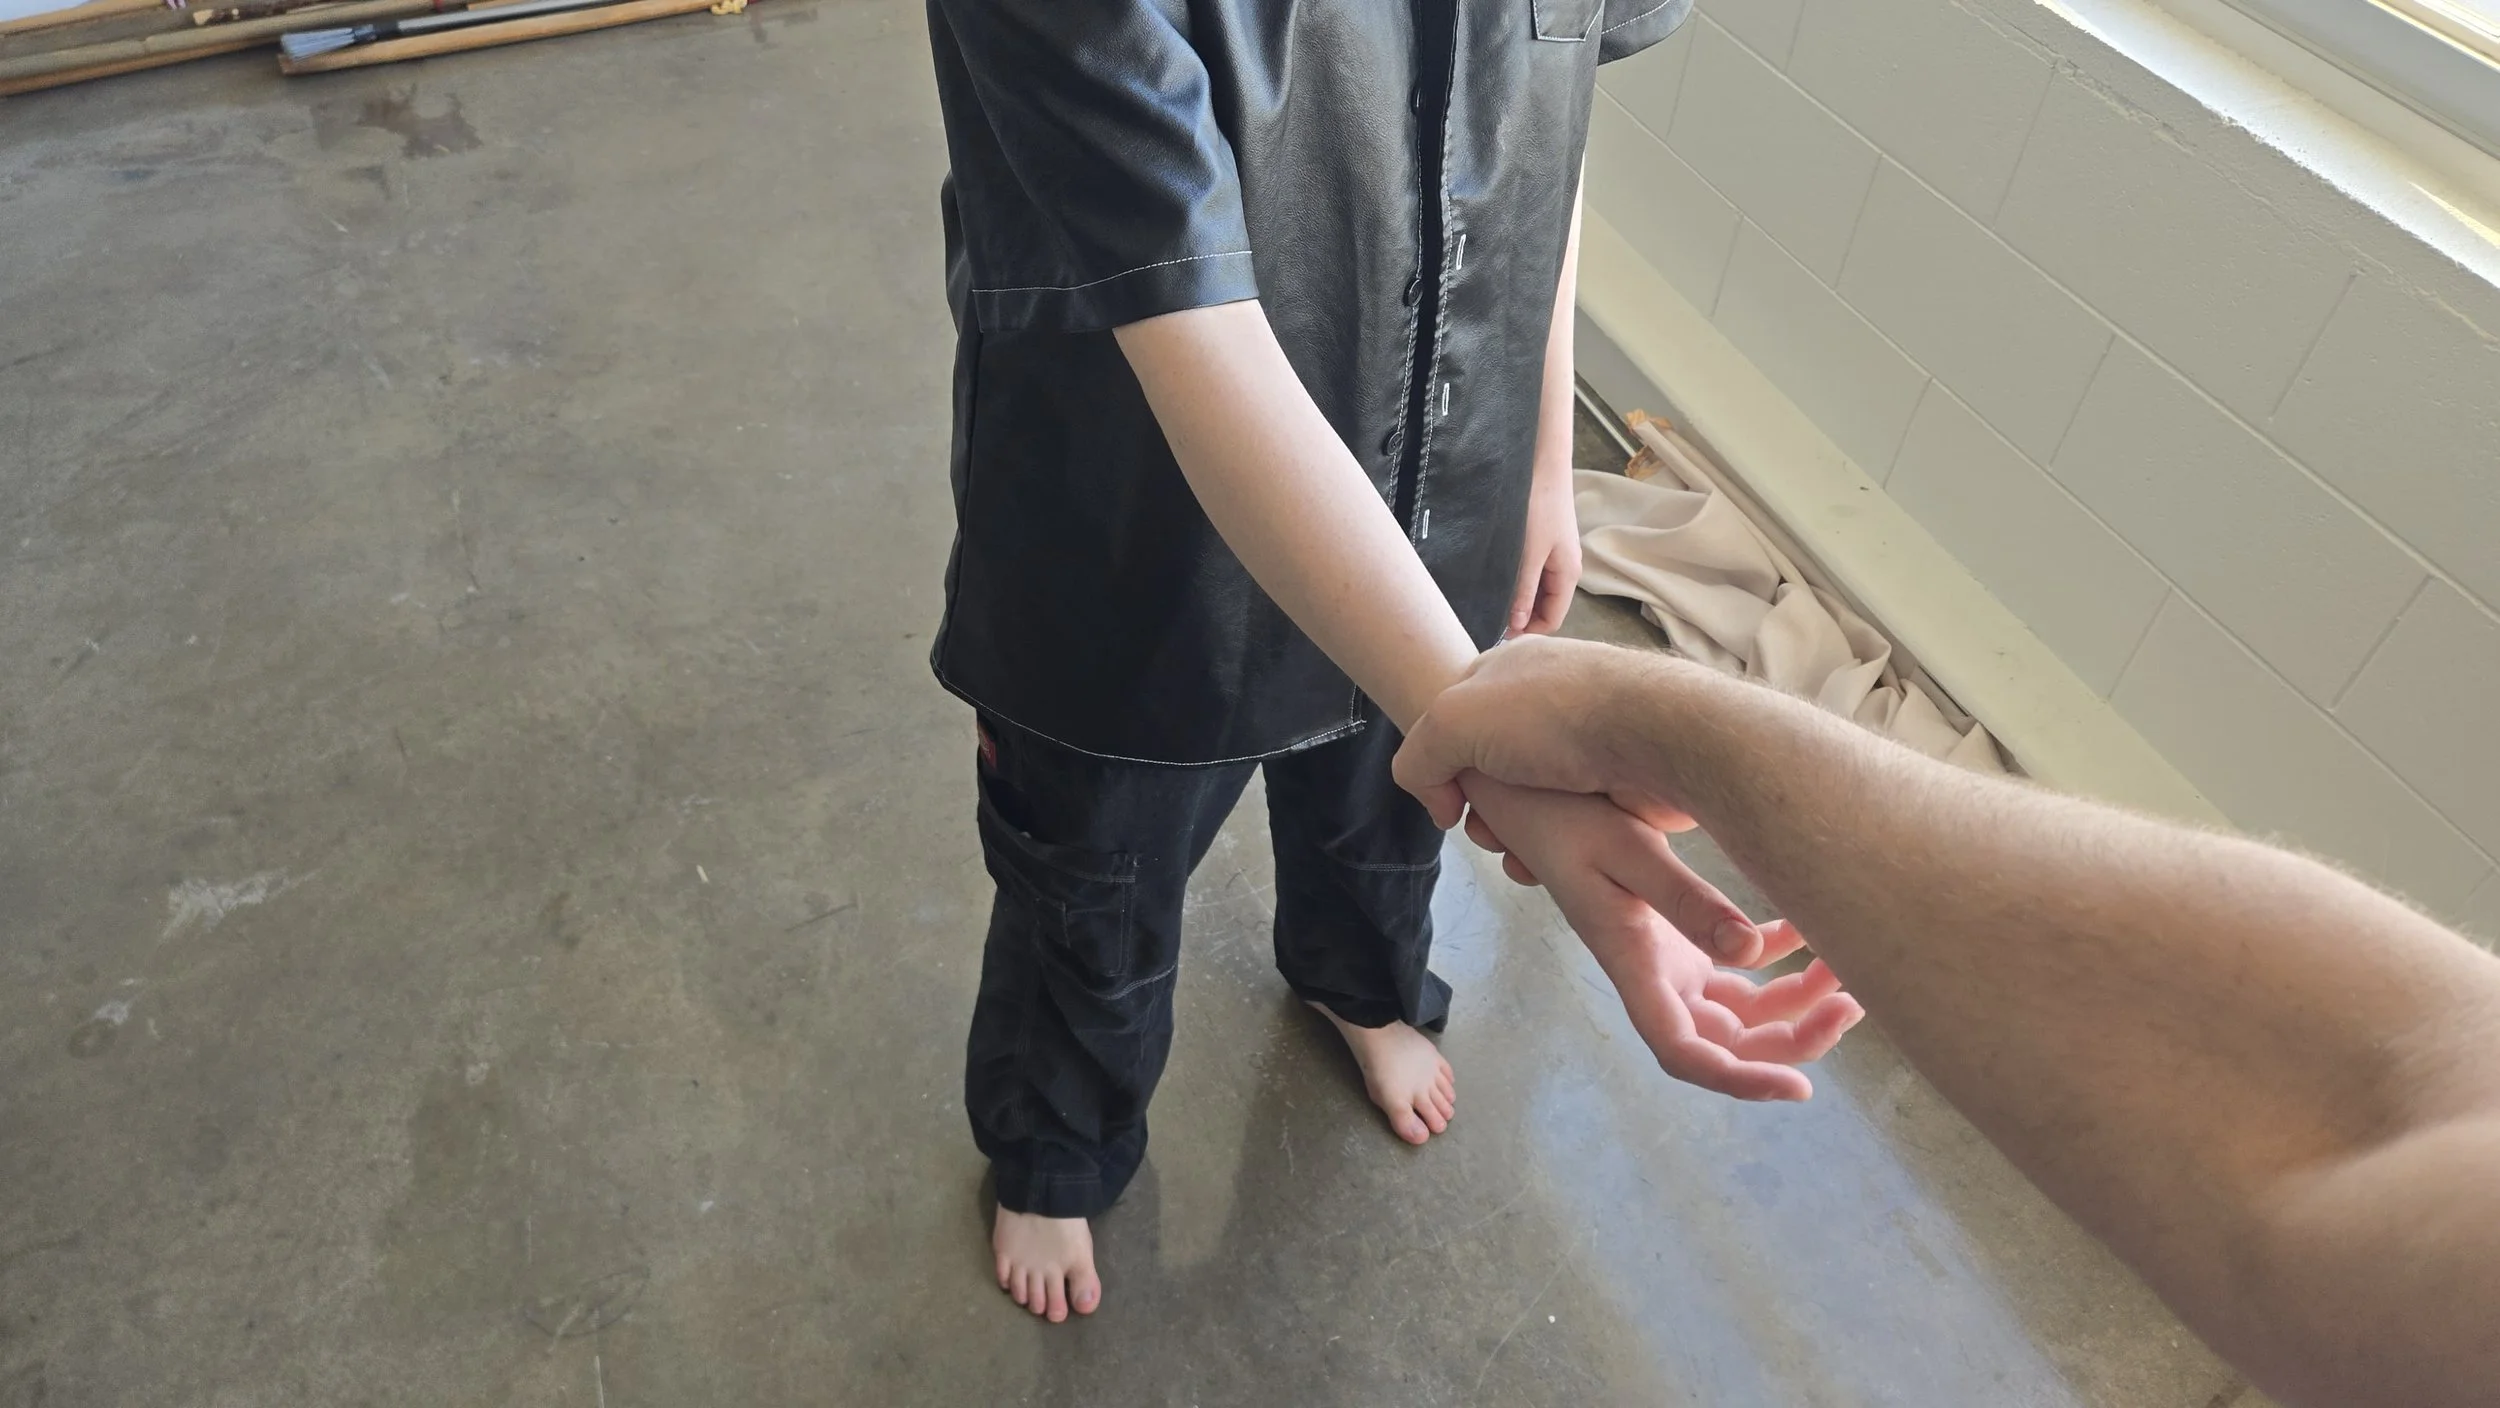
In this tutorial, the attacker is grabbing my left hand with his left hand. However, this defense works no matter what hand the attacker grabs with; Even if it’s a two-handed grab.
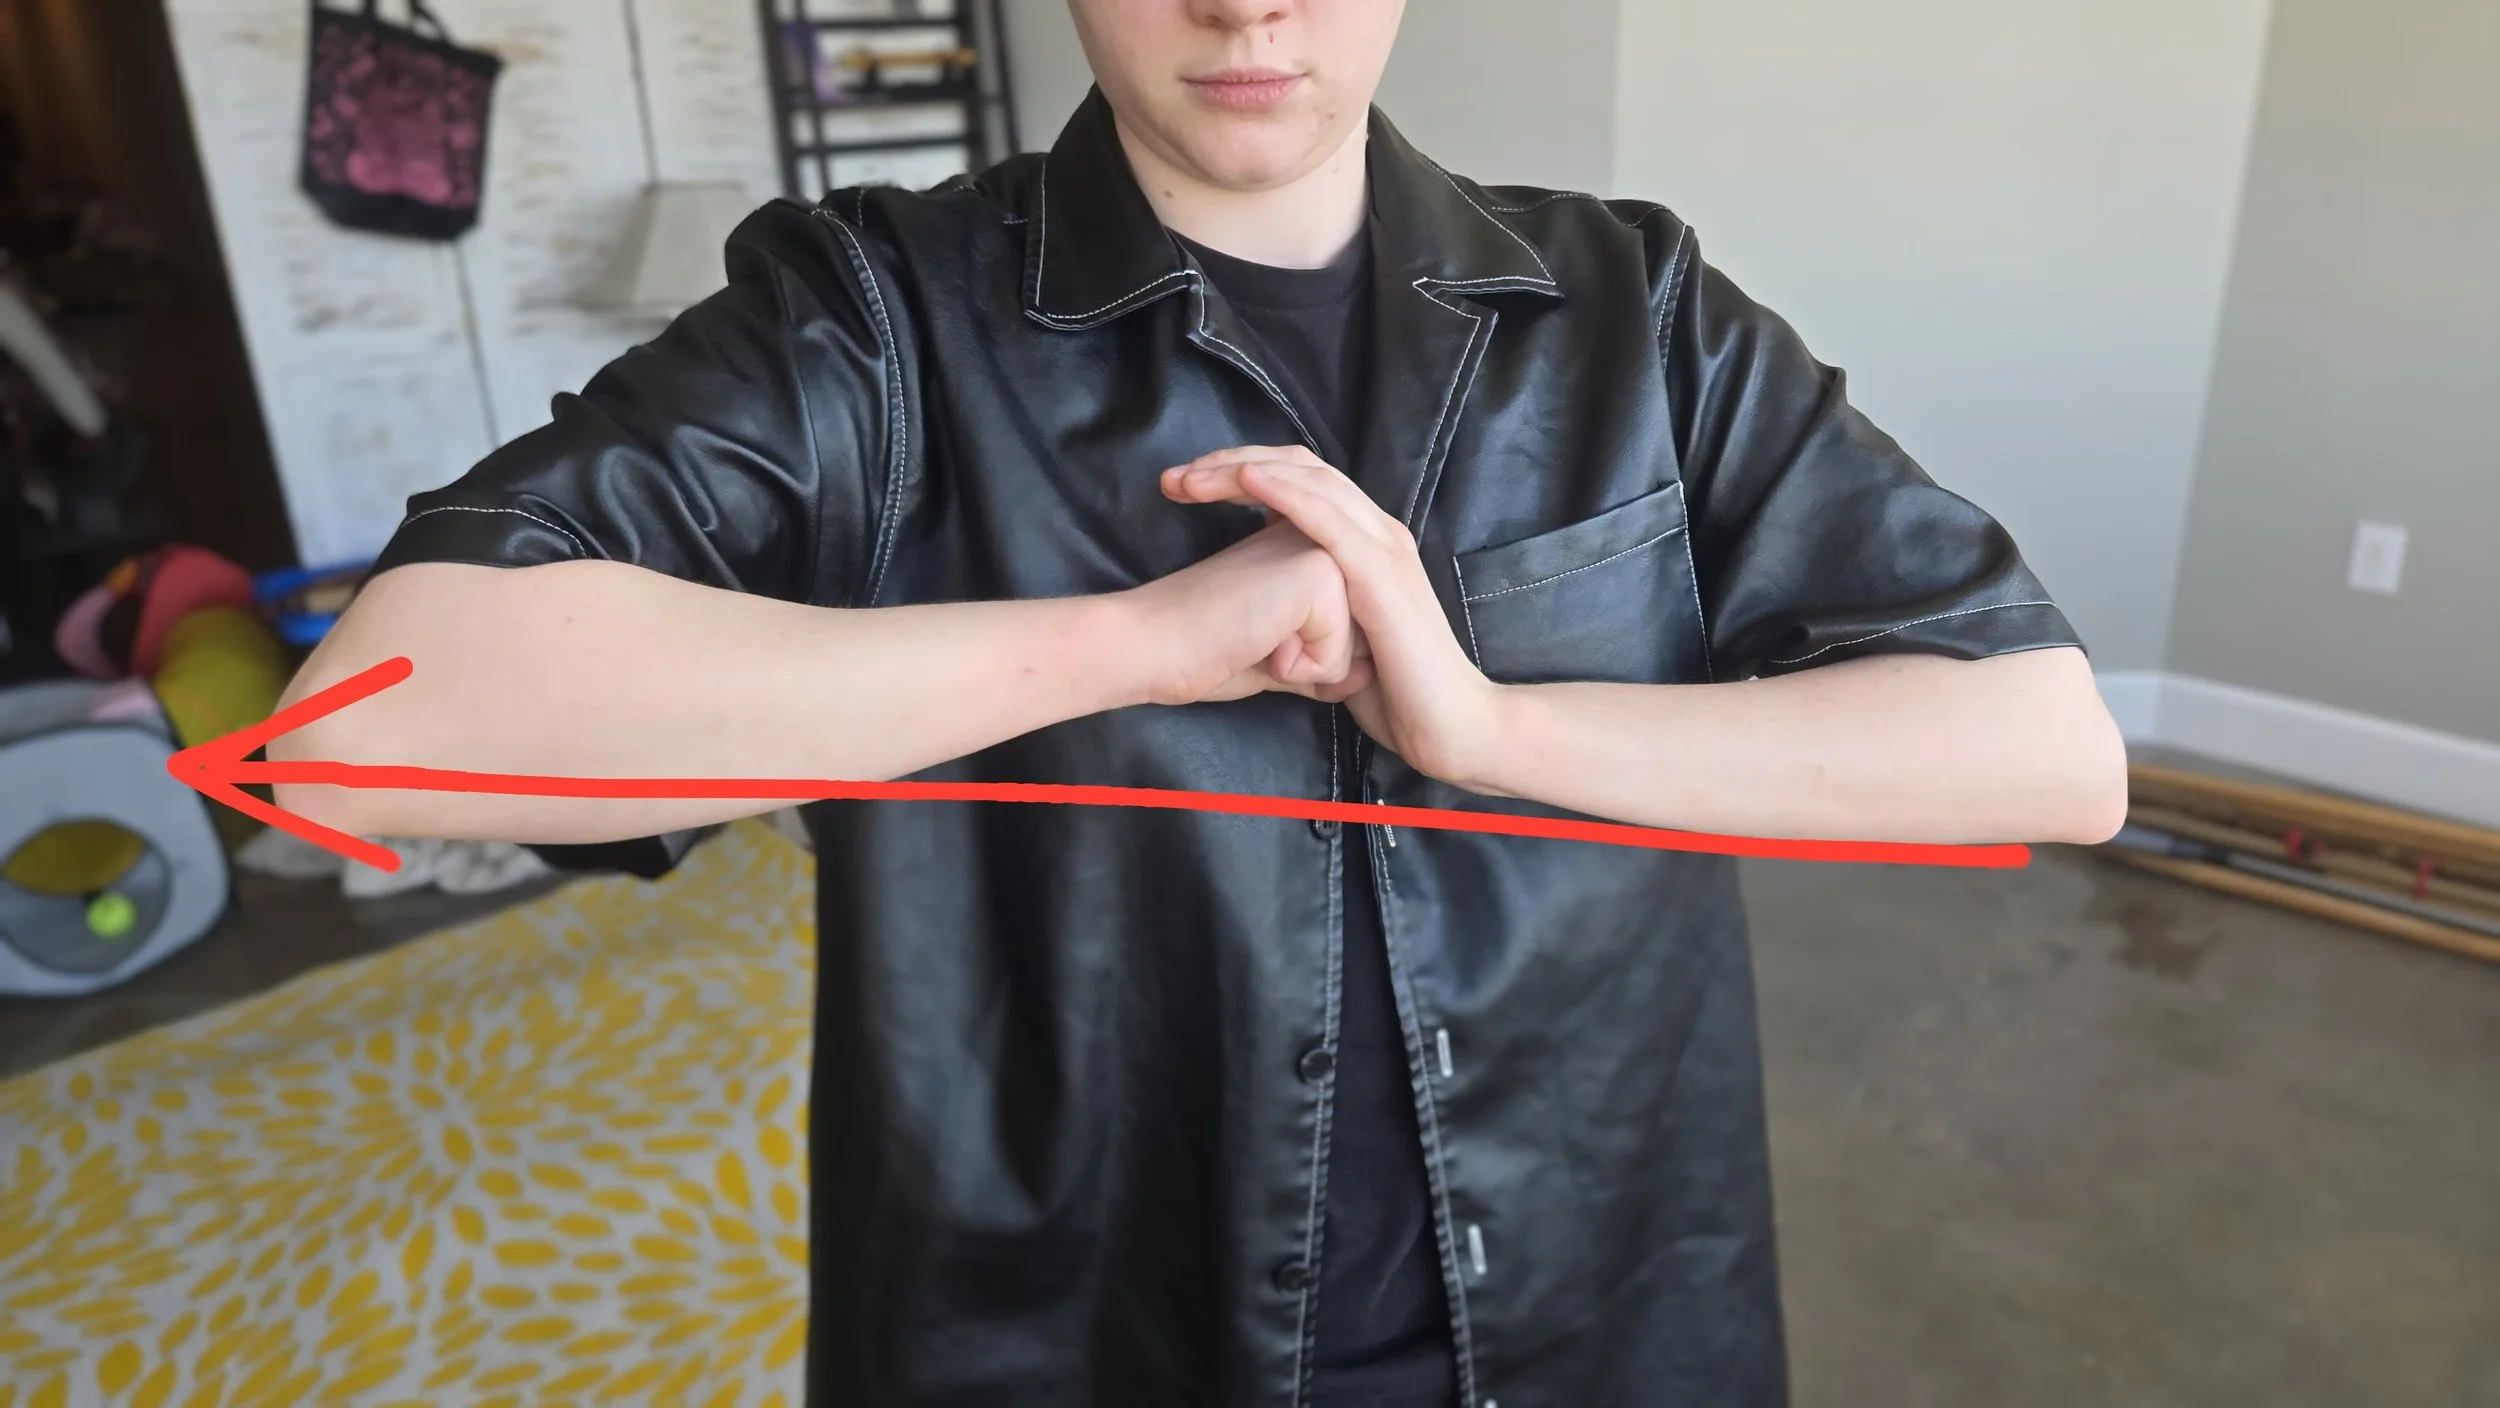
Step 1: Make a fist
This changes the shape of the wrist. It's not an absolutely necessary step, but it's a good addition to make it more effective, and I find it helps beginners with the next step.
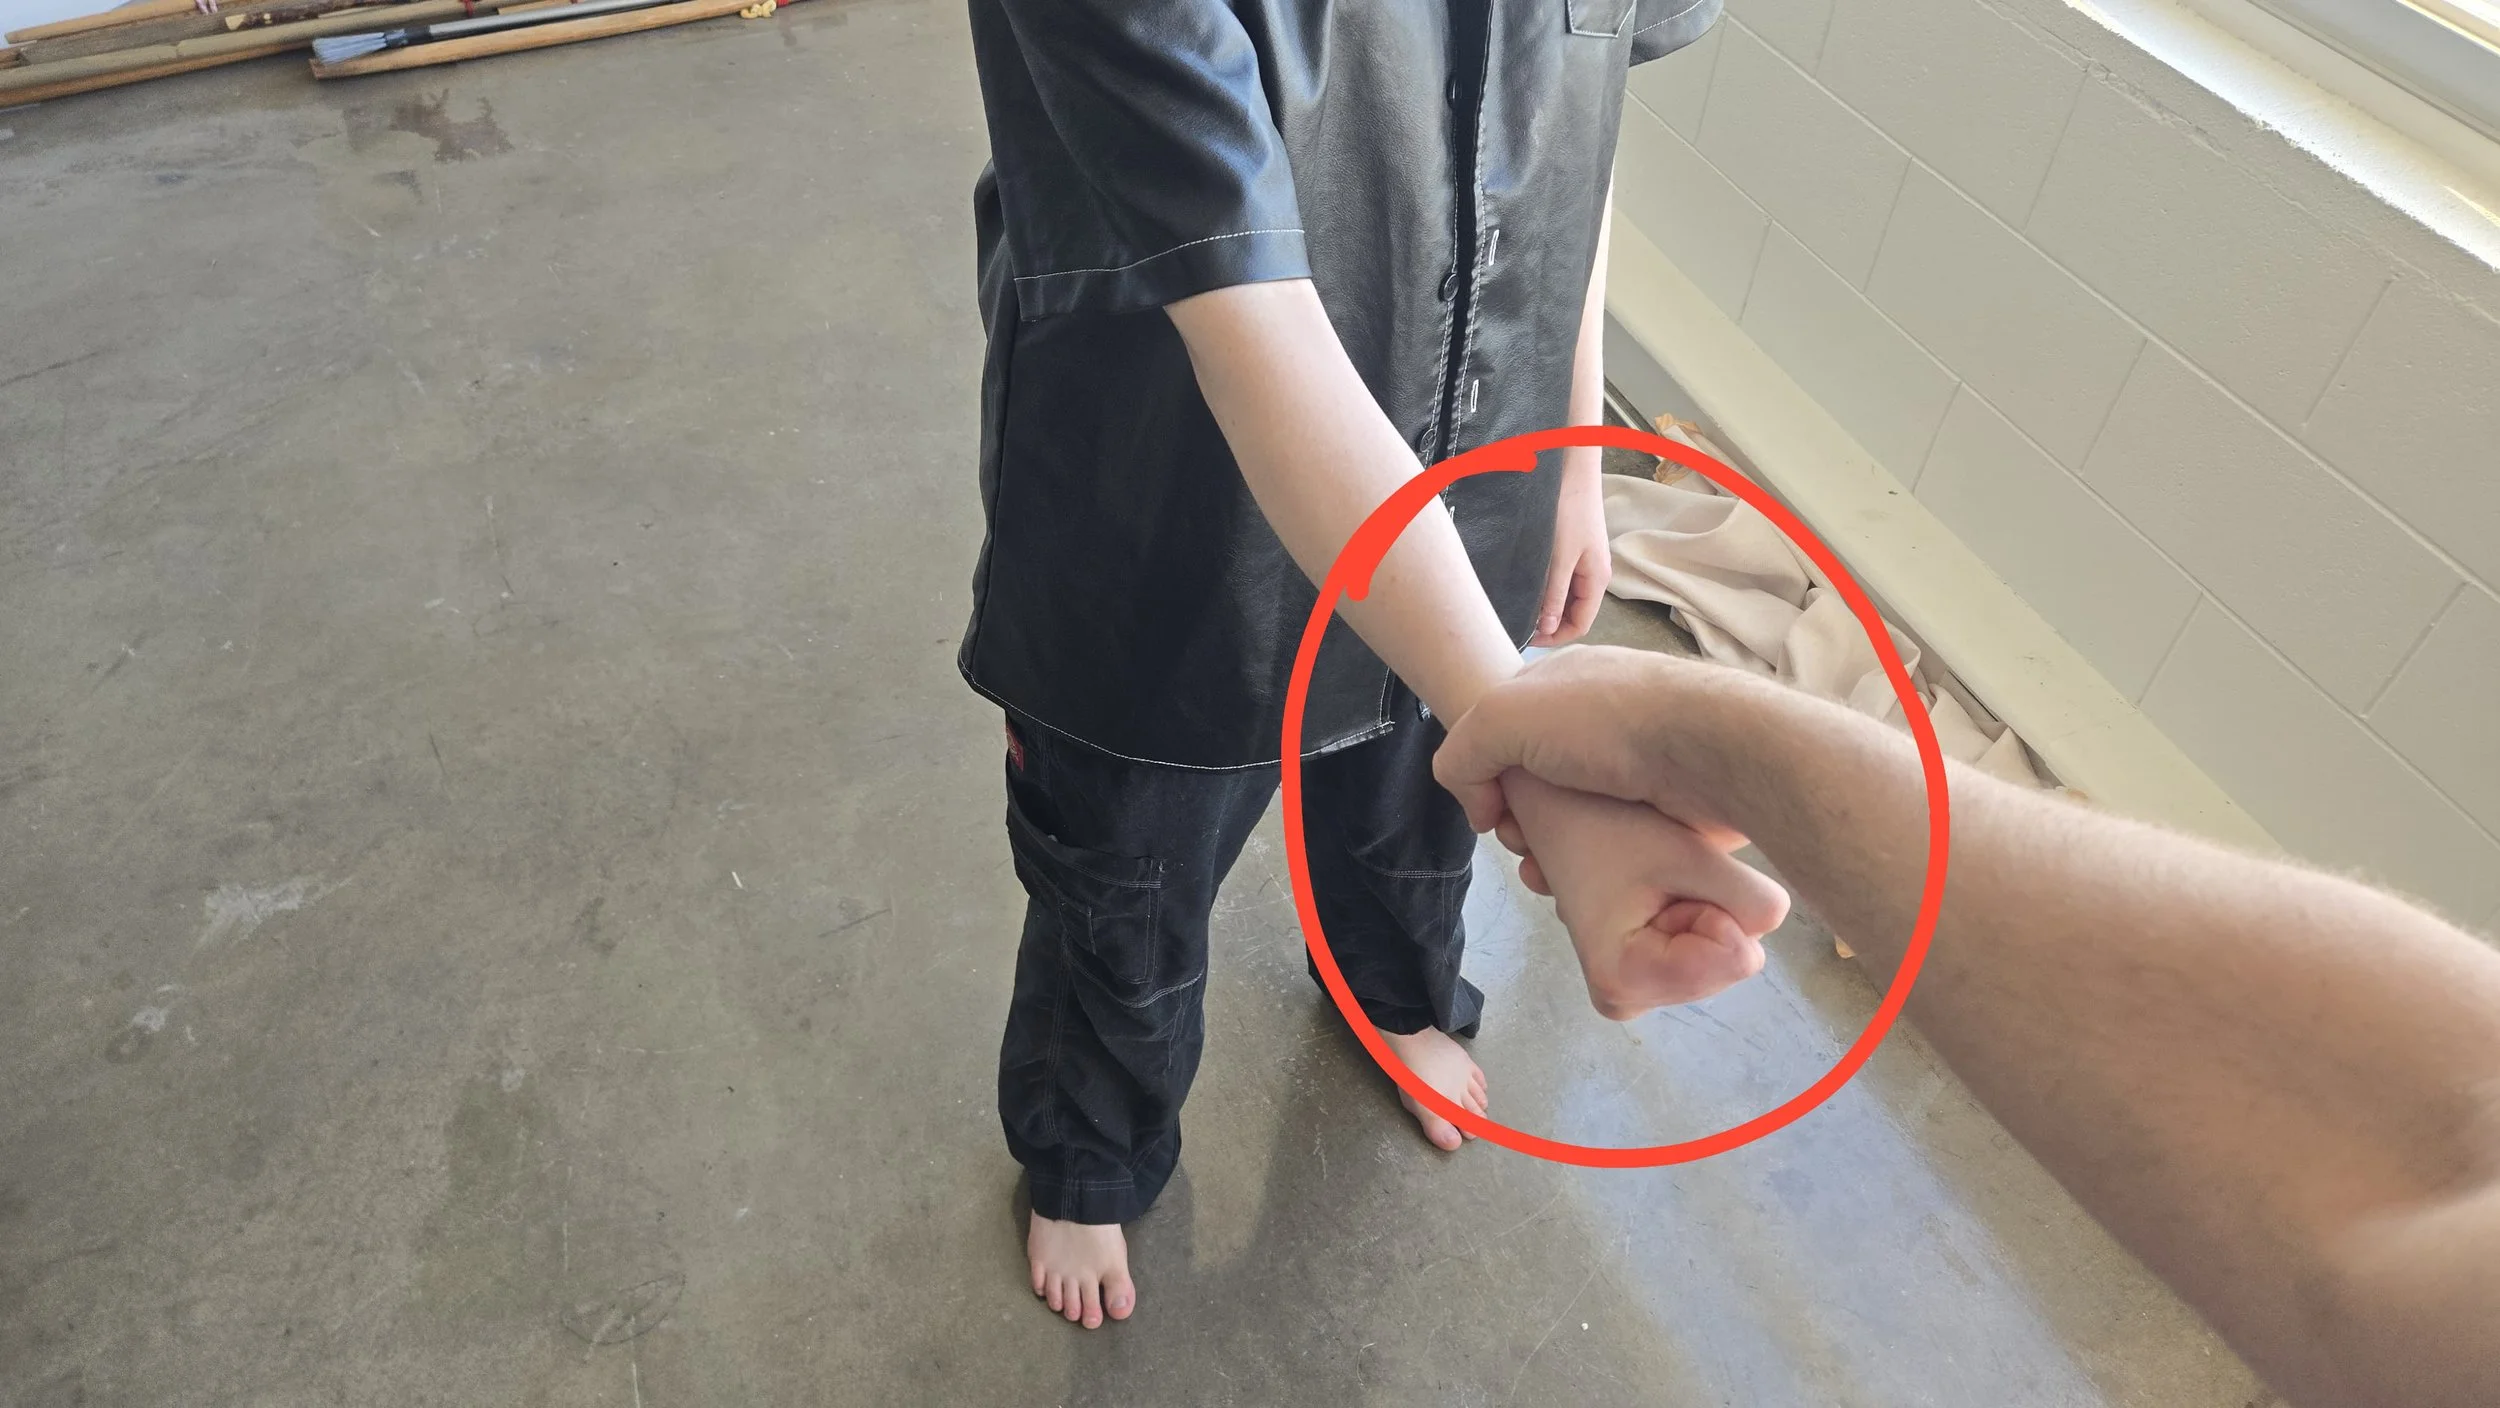
Step 2: Grab your own fist.
Don't try to do anything fancy here.
Step 3: Step back opposite your hand that is being held.
Don't take a big step. You're just planting it so you can do the next step, which is where it gets a little more complicated.
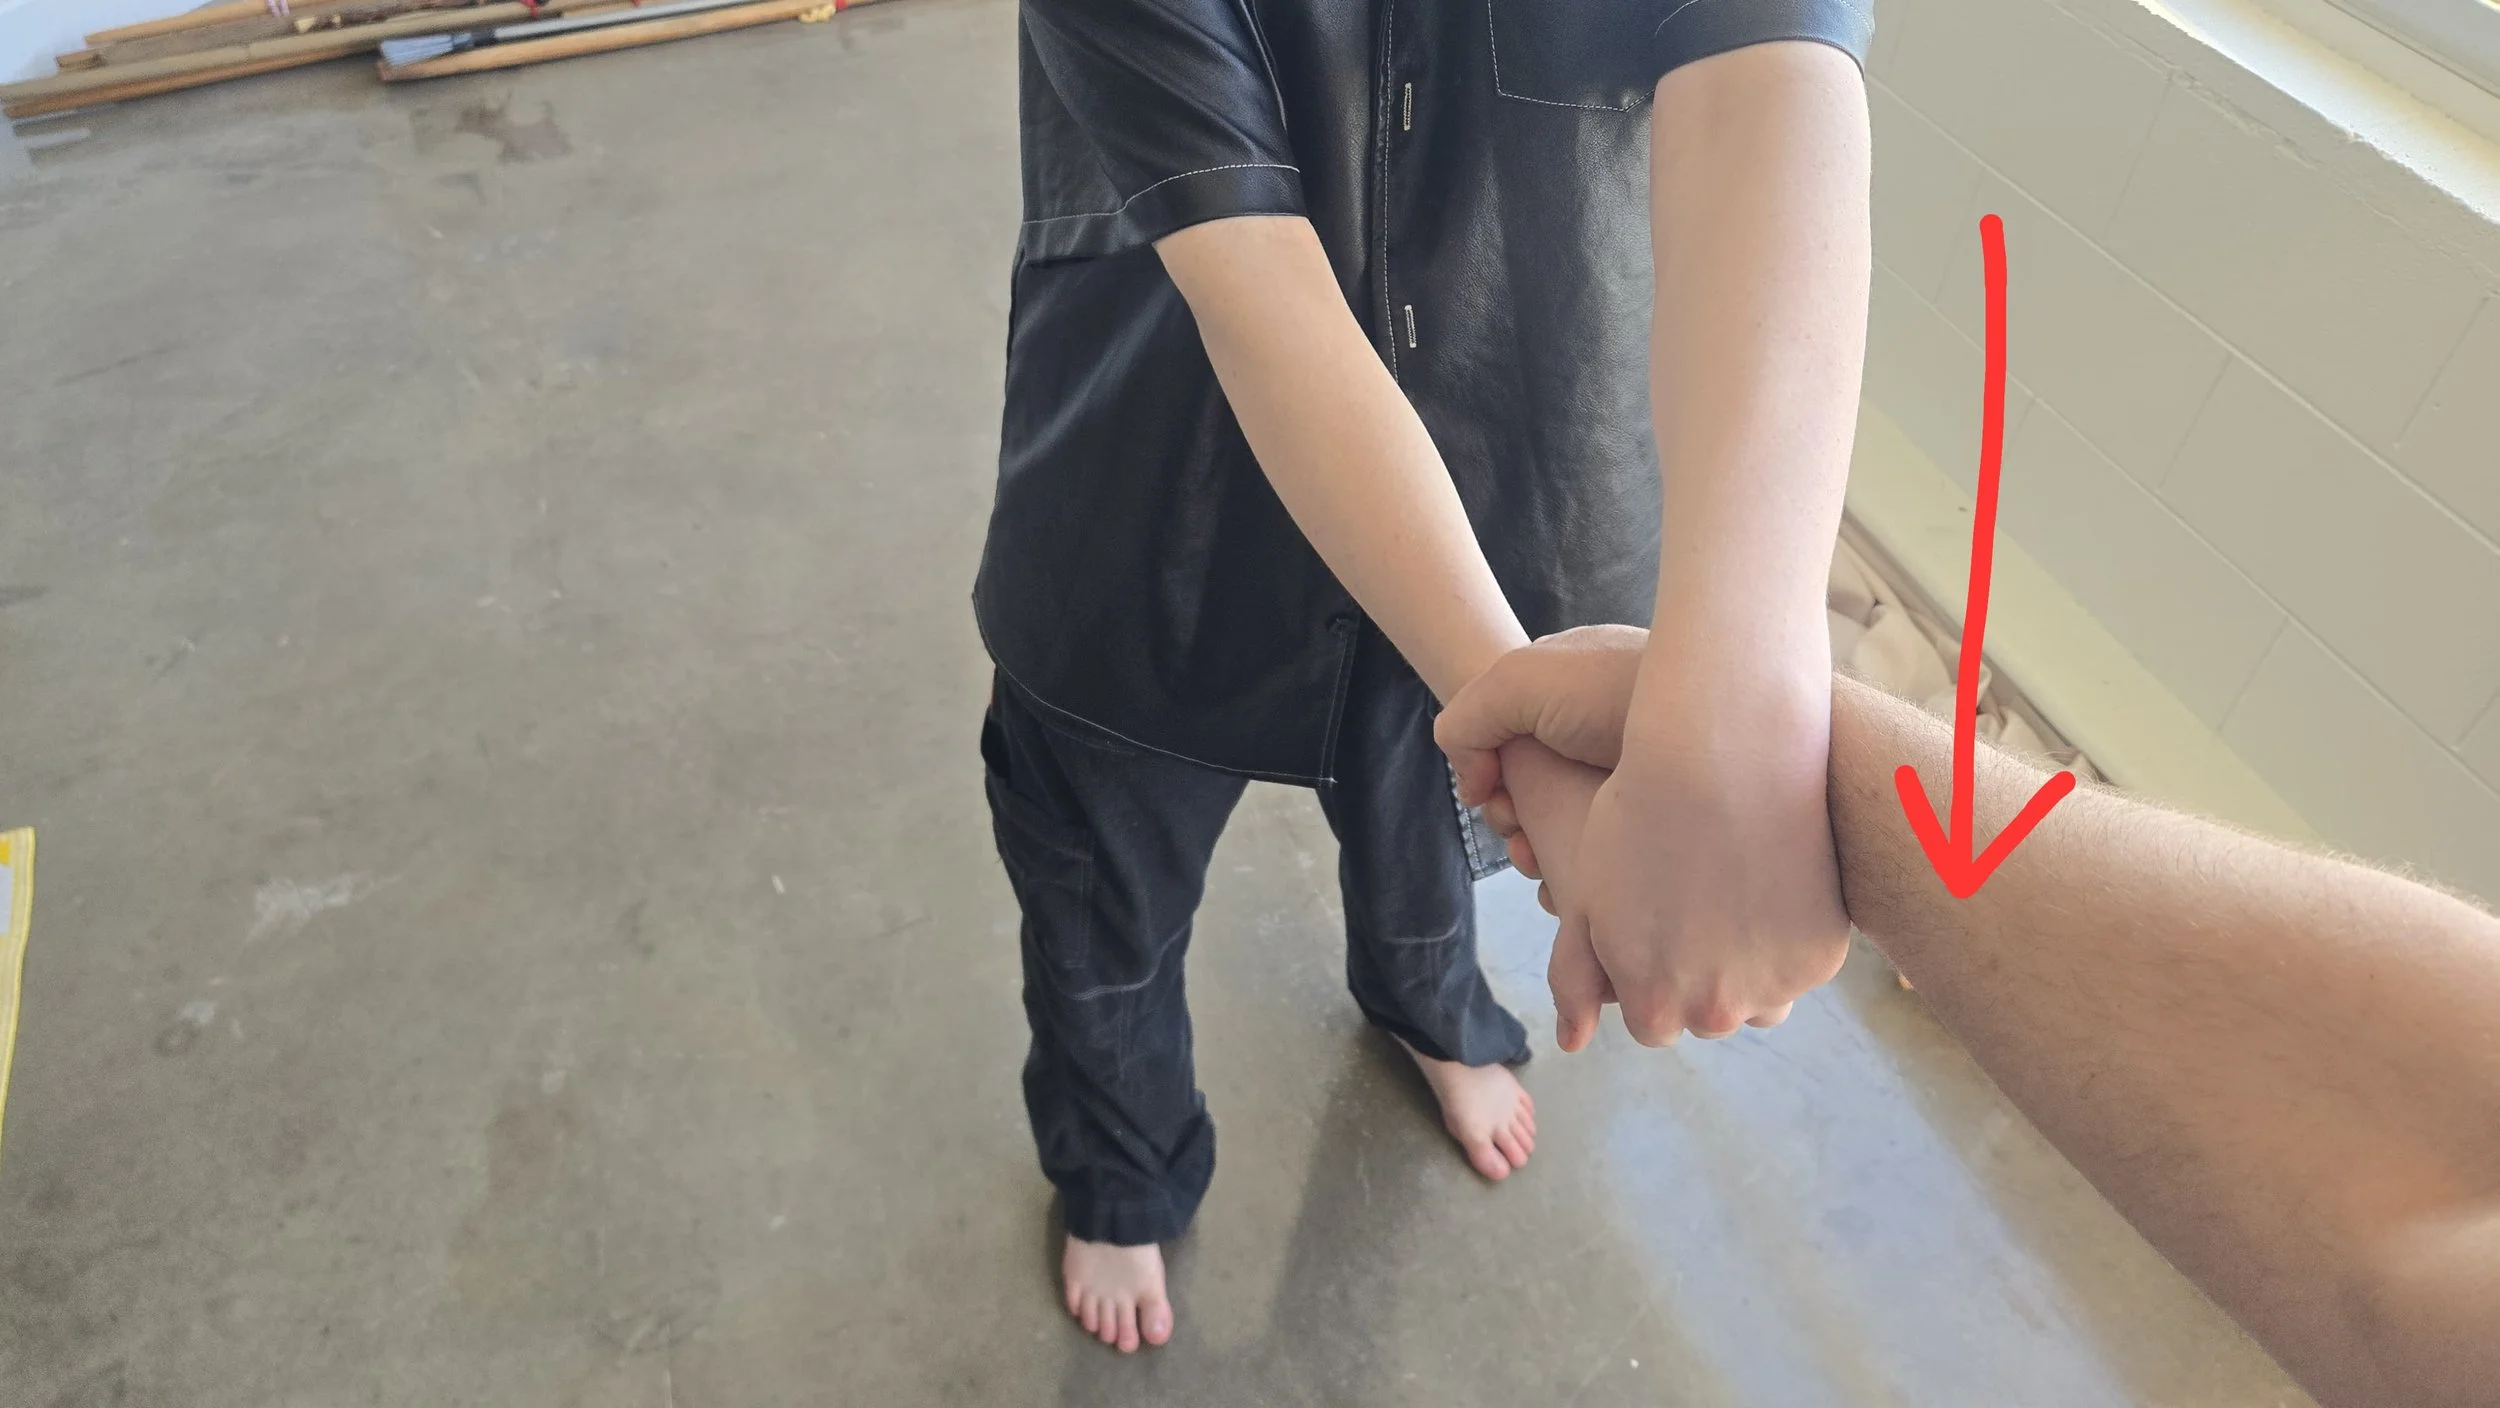
Step 4: Turn to the side, bringing the thumb of your fist to your chest and pointing your elbow at your opponent's chest.
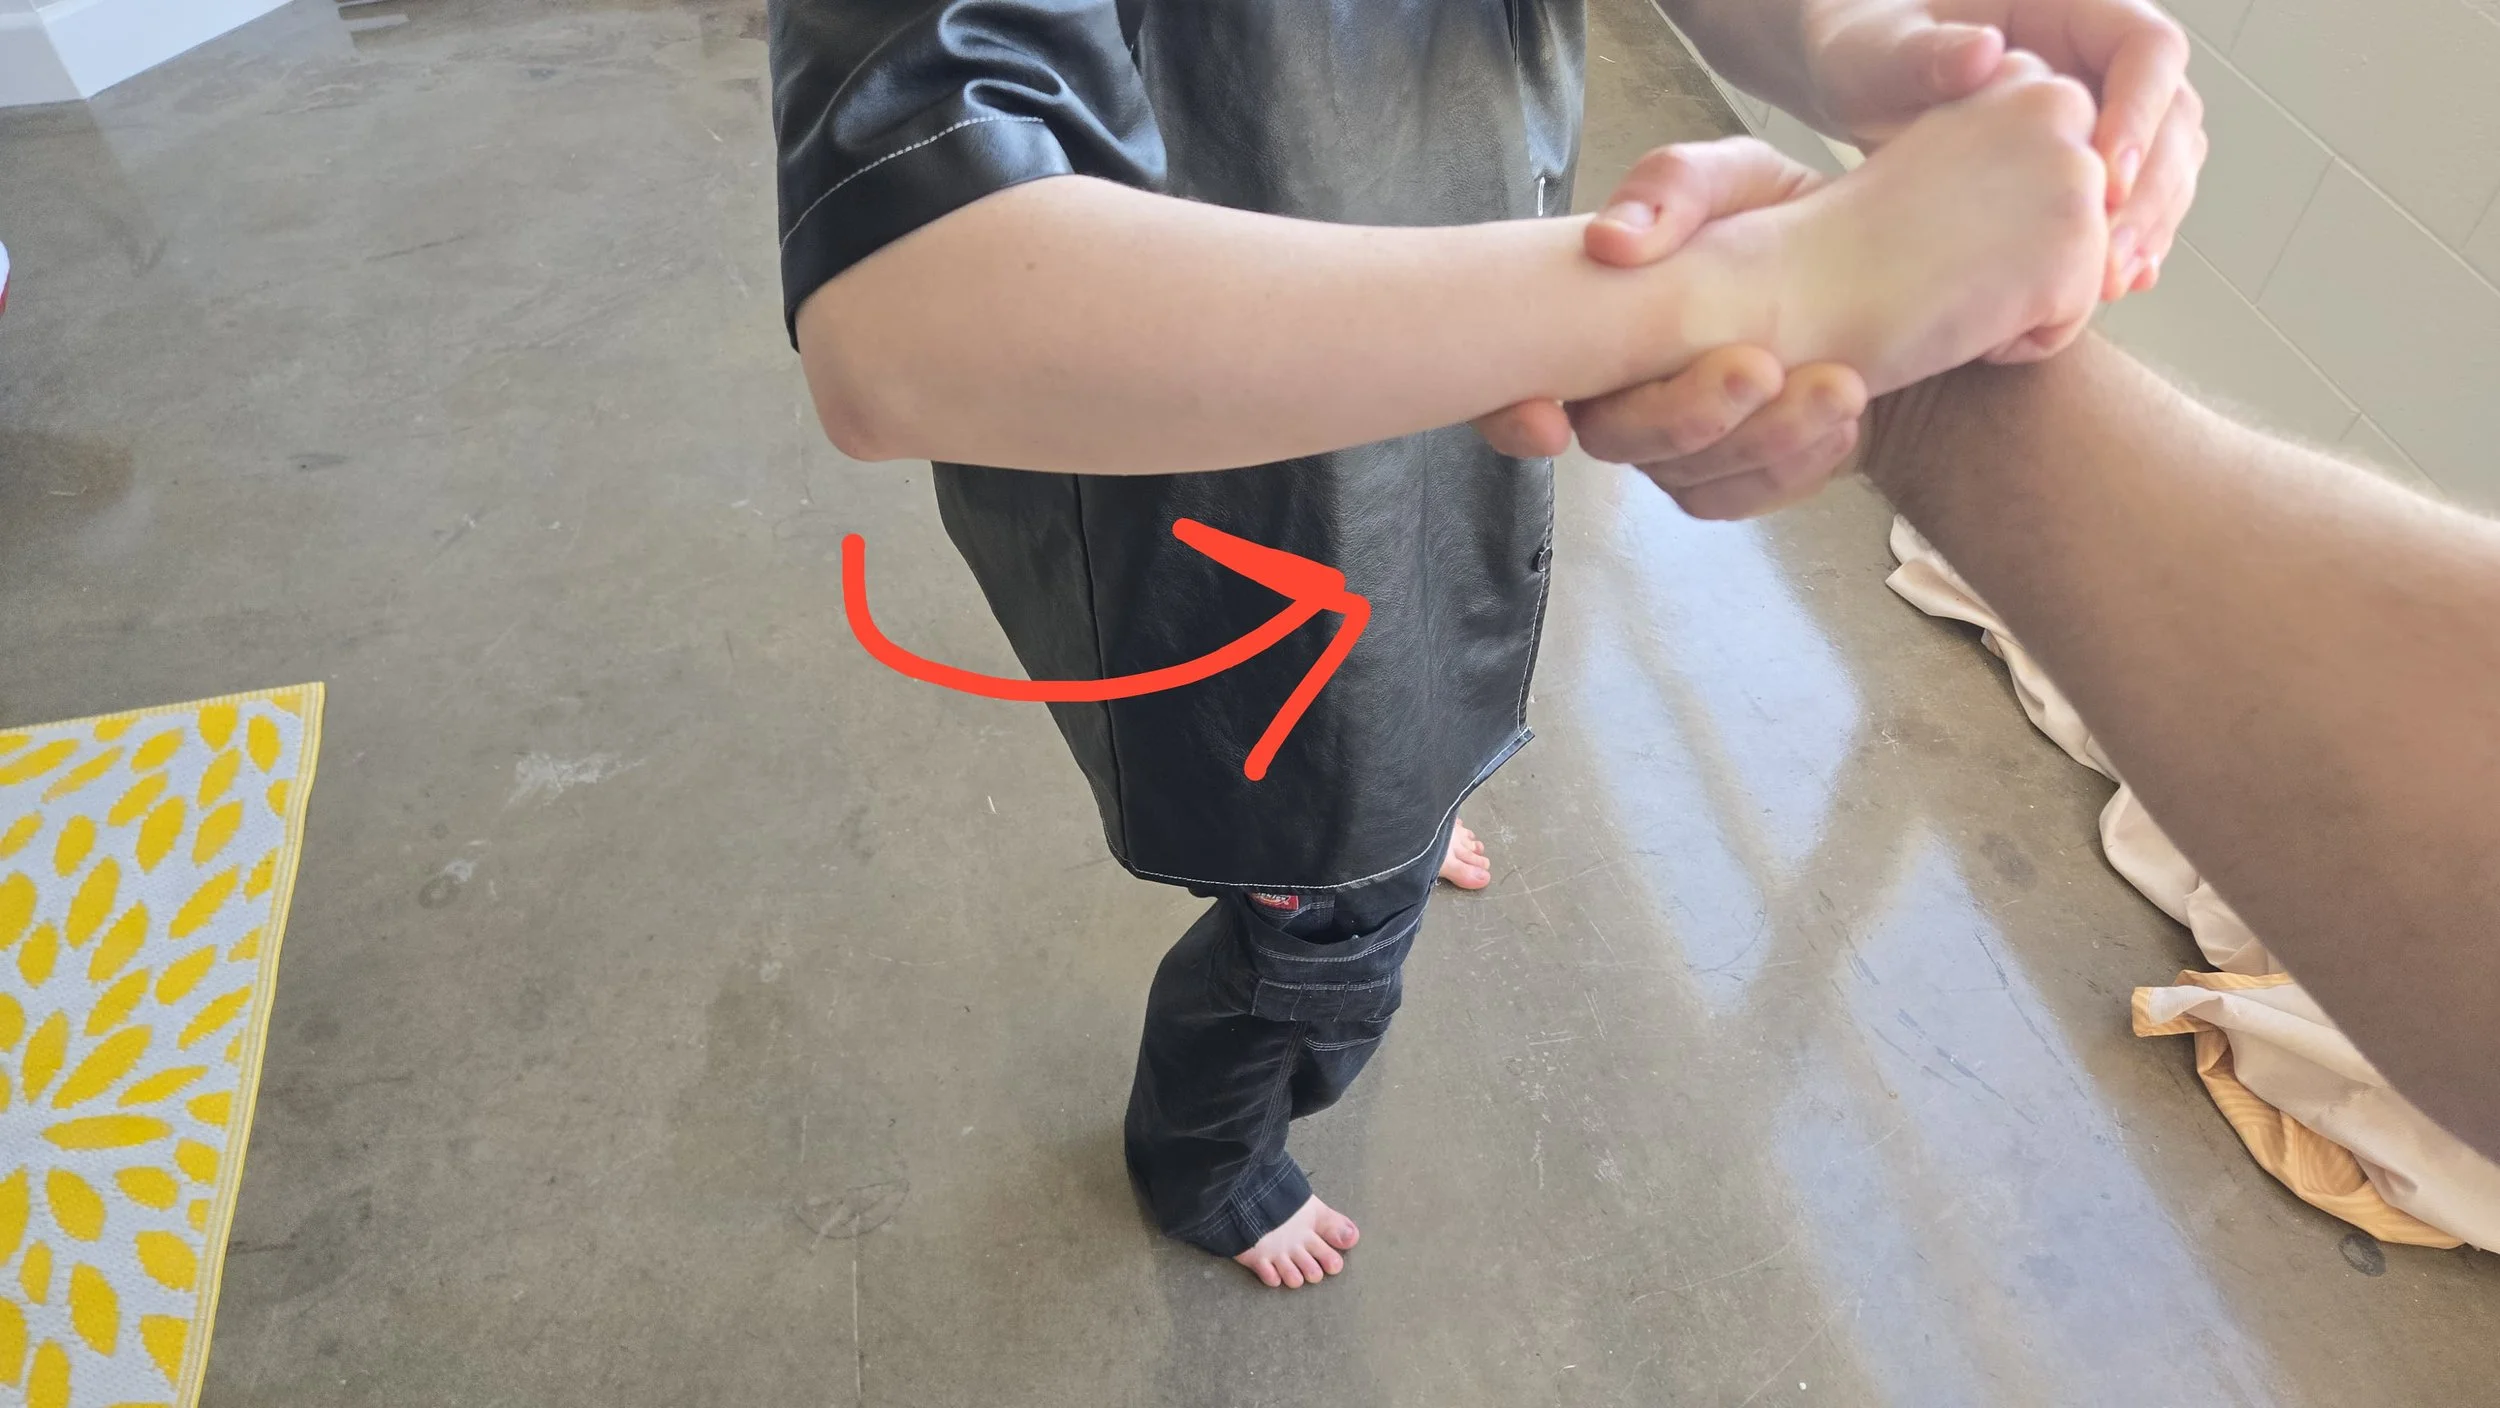
Because I can’t hammer this in enough; You’re going to TURN, not pull. It should feel anticlimactic when you break free.
Let's break it down a little more.
When you turn to the side, don't think about your arms. Instead, think of turning your hips so that you are perpendicular to the attacker.
When you're trying to bring your thumb to your chest, again, don't try to outmuscle the attacker. Even if you are strong enough to do that, you're training for a situation where you can't outmuscle someone. There's always a bigger fish. In this case, you shouldn't have to pull if you made sure to take a tiny step backwards, not a big one.
Finally, think about pointing your elbow in the direction of the attacker's solar plexus. Make sure your elbow is lifted up to point at it if your attacker is taller than you, or down if your attacker is shorter.
My attacker is slightly taller than me, so in order for my elbows to form a straight line towards the center of his chest, they have to be angled slightly upward. Also notice that there is no space in between my chest and my hands!
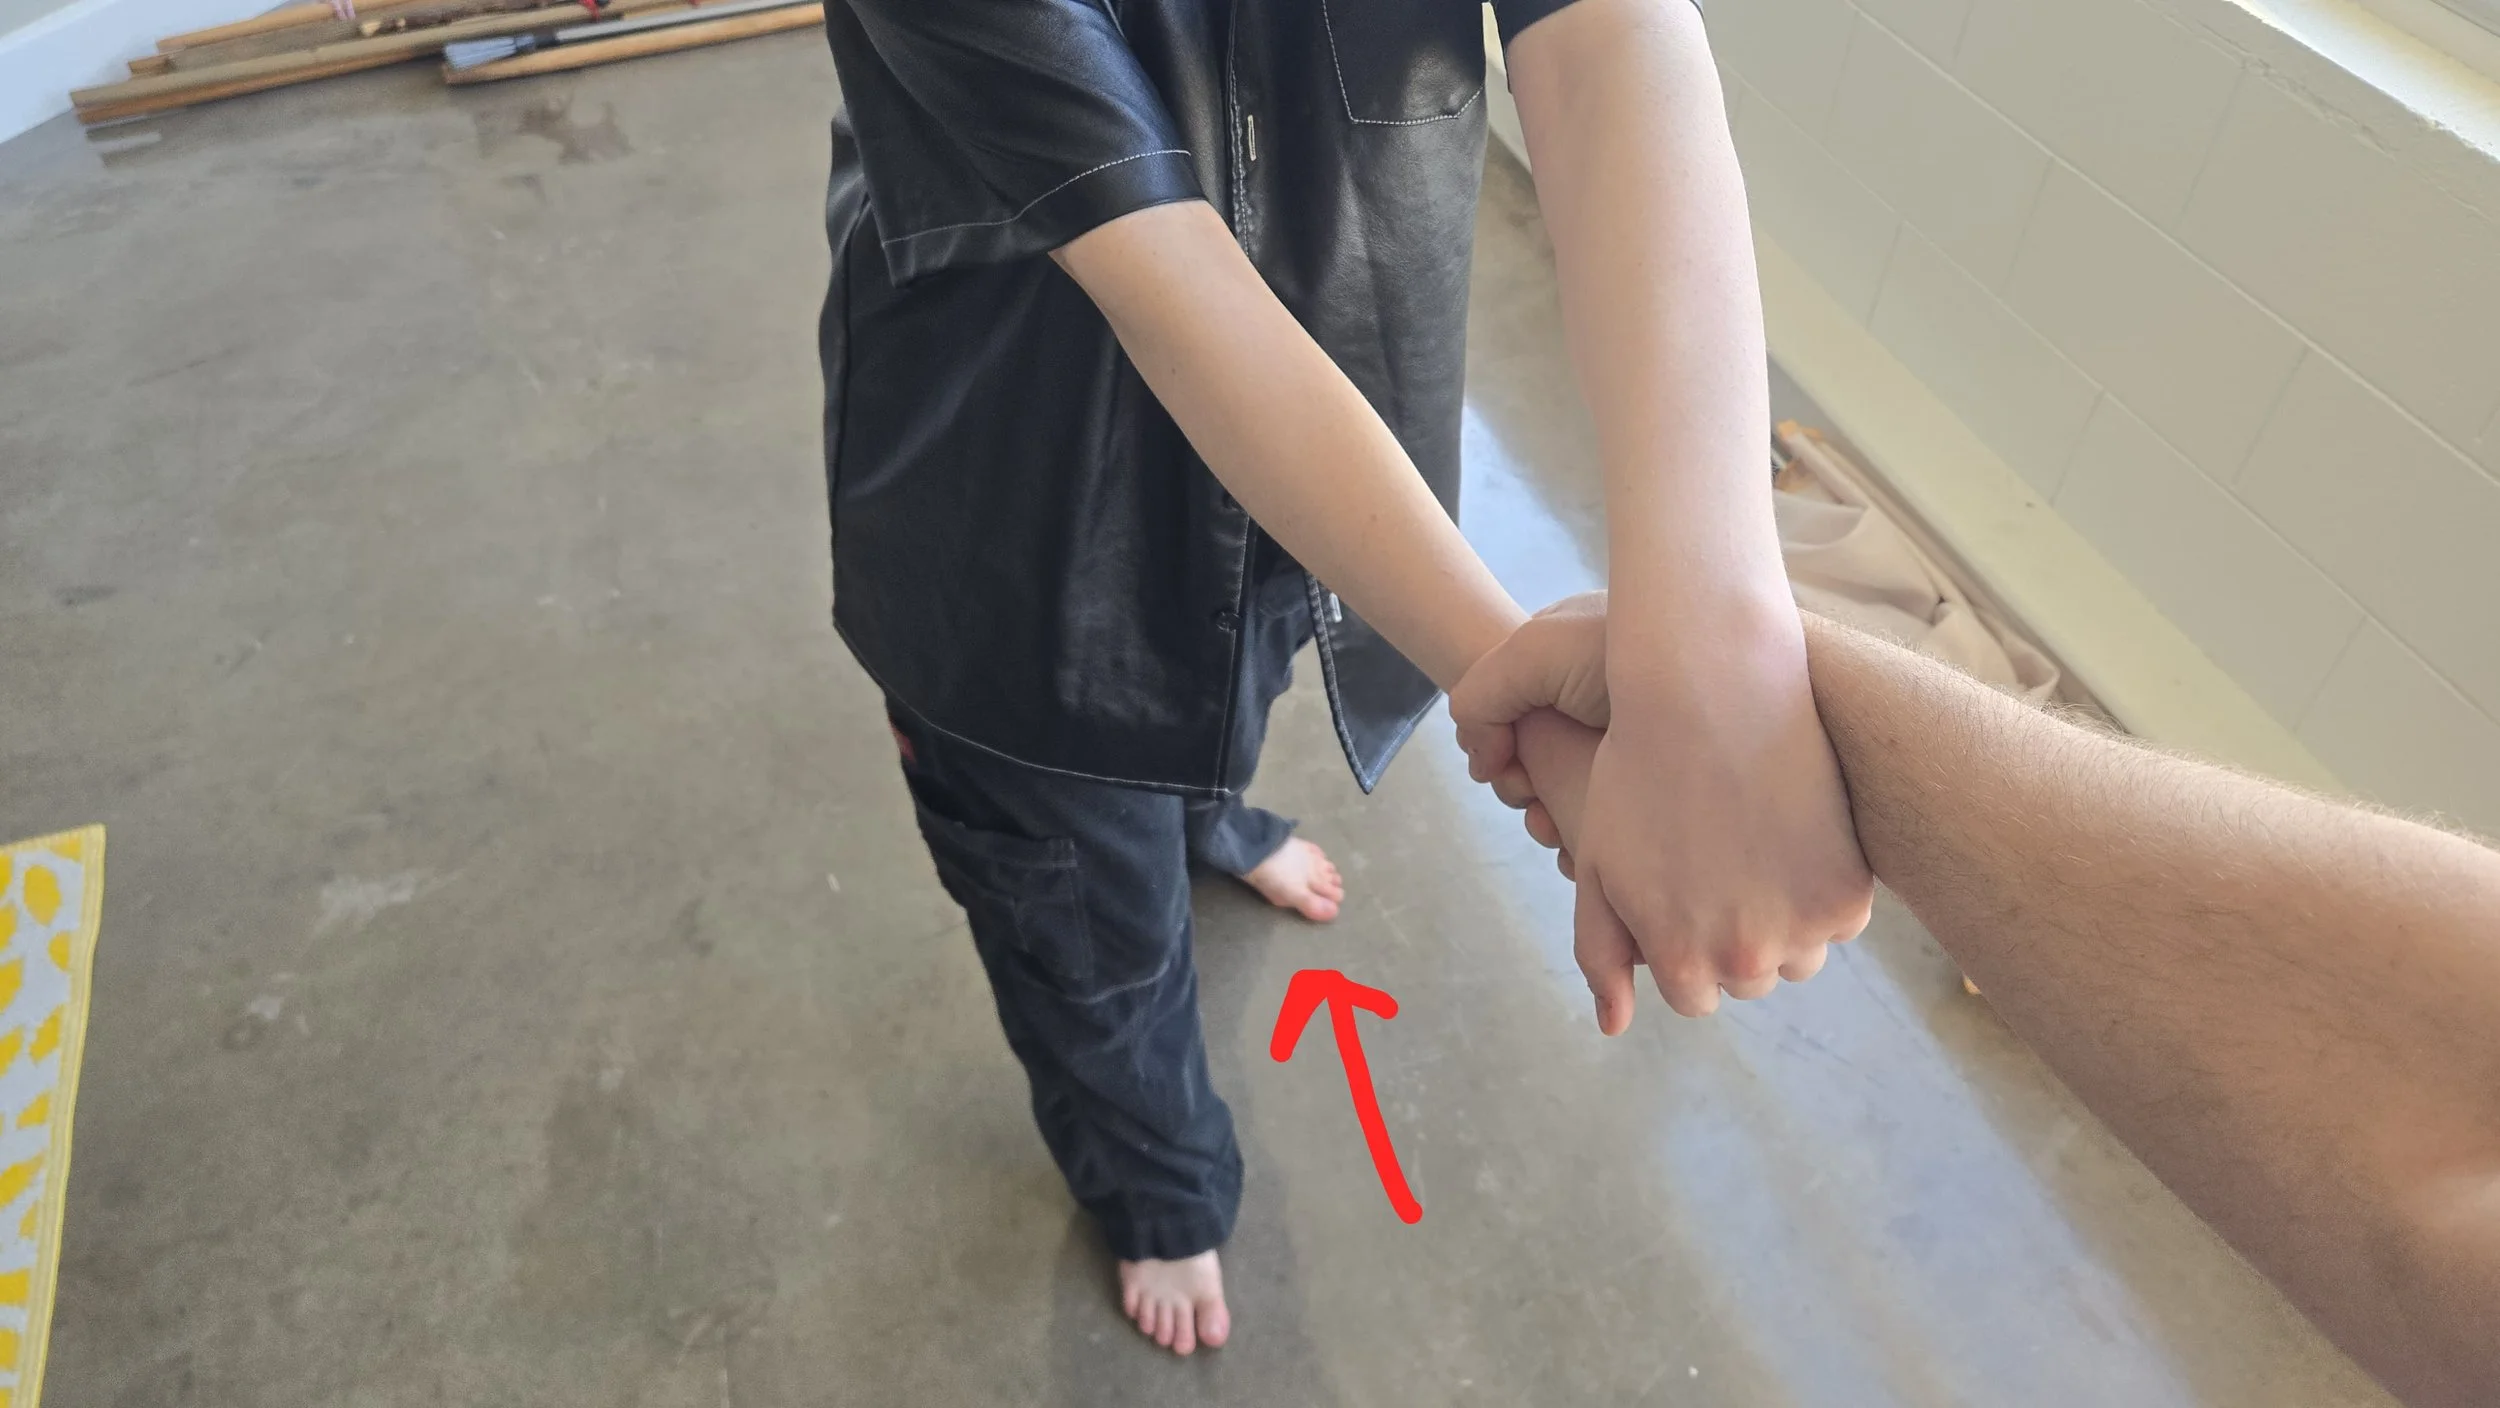
If you've done all the steps correctly, you'll see why you don't need to be strong to pull this off. You're not fighting the attacker. You're just making it impossible for them to hold onto you any longer.
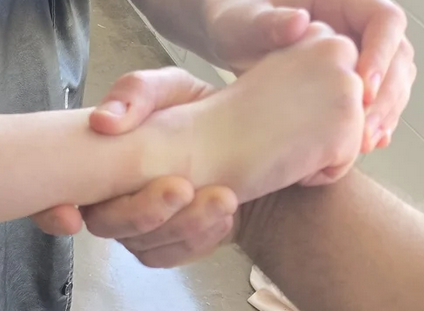
If you do it correctly, the attacker's wrist should start to bend like this, and their hand should snap off once you bring your hands to your chest. Even though the attacker is holding on tightly (see the finger marks on my skin?) this technique uses the weak points of his hand against him.
Is it a lot of steps to memorize? Maybe at first, but it ultimately boils down to four movements. Is it effective? Absolutely.
Keep in mind this is a step-by-step for beginners to practice. This article is not designed to teach all the key principles that make this work, or how you want to alter it if the opponent is pushing or pulling you. We go over these things as well later. Learning this sequence is just a first step in a deeper understanding of self-defense.
Once you got it down, you don't think about each individual step anymore. In the video below you can see how fast this can be: and also that it doesn’t need to be fast to work.
From here, we teach beginners that the next thing we do run away. That is because this specific escape provides a technique that we can use before the situation escalates into needing to harm the attacker. The unfair truth is, if someone grabs us and we escalate to punching and hitting them, even if we know they mean to hurt us, we might be framed as the assailant: Either in law or in public opinion.
But there are situations where running will not work for us, where we need to not just escape, but escalate so that we prevent the attacker from harming us further. And ironically, that’s the easier way to break out of this grab.
But that’s going to be next article. Stay tuned!
—Bridget